
Customizing Ionic
There are two ways we can customize our Ionic App: The first is through changing the content, and the second is through changing the design. In this blog, I will focus on customizing our content which will be done through Angular.js. I will go over some basics of Anugular.js but I recommend that you brush up on your Angular before you start customizing the content of your app. I used a great course through Code School which I really enjoyed!
Getting to know your App
Before we can customize our app, we should understand how it works. I will give a really brief overview of the app structure now and then we will get into more detailed information with examples.
I cloned an default project from Ionic called myApp. With myApp I got a bunch of folders and files. For customizing the content of myApp I will be looking mainly at the folder www. So if we open up the www folder we can see a ton of files and folders:

The folders are organized by type- the css, js, templates are what we will be focusing on. The the templates are all of our pages (or views), the app.js folder is what routes our application and the controller.js defines the controls.
Overview
The User Experience
When our app loads, we first see the Dashboard which has some dummy text and at the bottom is the footer bar with different tabs for each page view we can look at. If we click on any of the icons, we get redirected to that view.
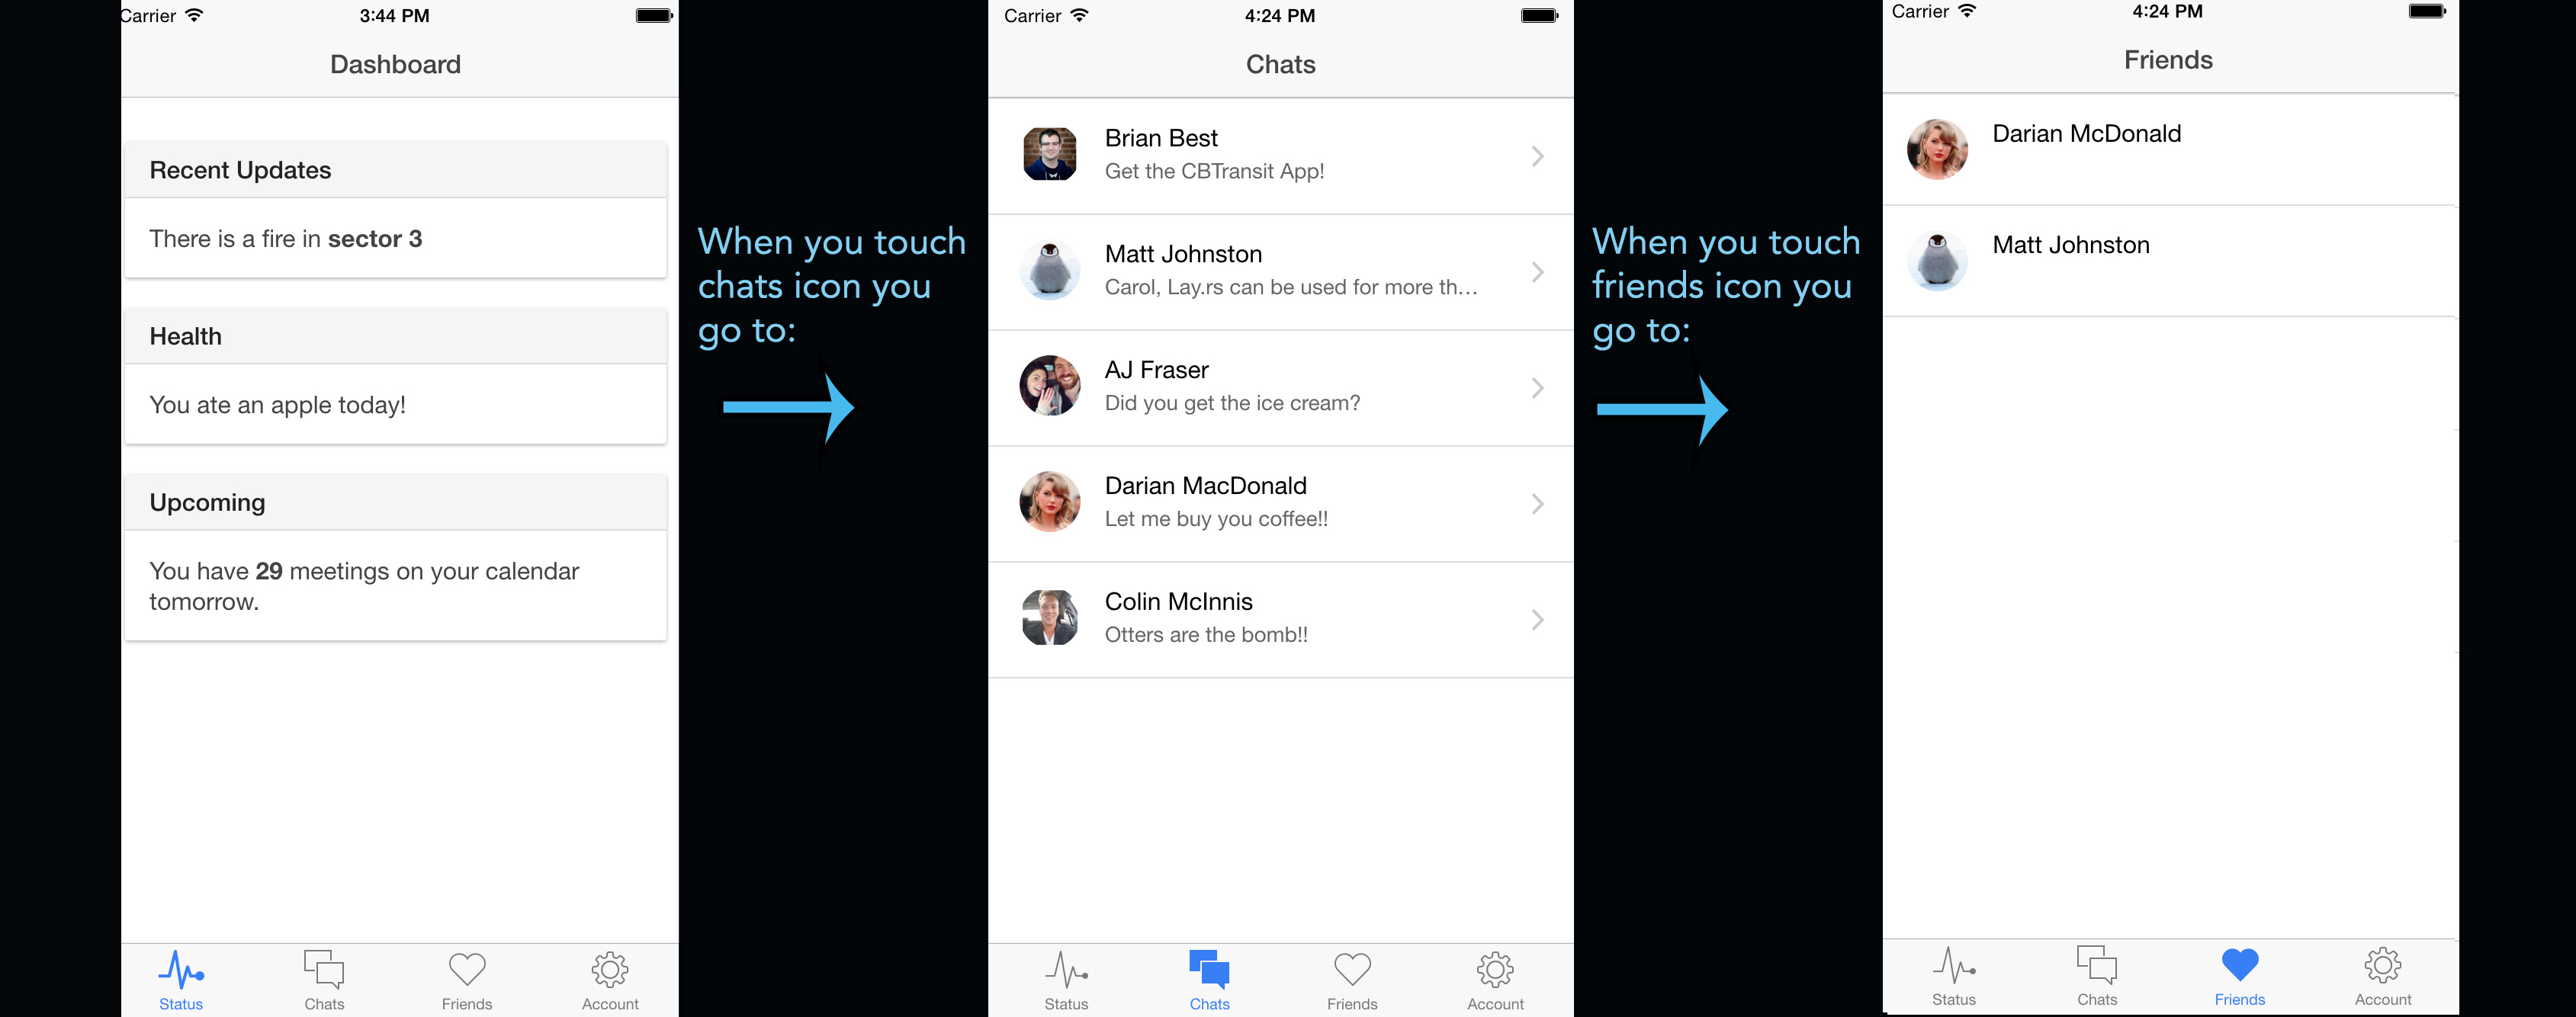
Also if we click on one of the specific people in the chat or the friends list we can see the individual's information. This is cool becuase it means we can nest pages in pages.
So lets click on one of the people in my Friends:

When we click on Matt, we can see the individual data for Matt.
This is the basic functionality of this app. There is a tab bar at the bottom, which allows you to create different views, and within those views you can nest more specific information. So let's see how this work on the coding side.
The Code Side
So the way the application works (simply) is that the app.js file loads the initial html page, then when the user does something (a click or a submit), the loaded html page tries to change the view(page), it sends the change request to the app.js. The app.js specifies the routes, and the routes specify the templates(pages) that load and then controller.js populates the data when a page is loaded.
We will look first at the app.js file which does the routing. It sets up the url routes and that means that we are specifying each page of the app and then linking to them with urls. If we look at our app.js file we can see all of the pages (states) that our application has.
app.js

This seems daunting (because, well it's a wall of code!) but don't worry it will become clear. Let's just focus on a piece of it to begin; we'll start with the tab state.
This is a unique state because it is abstract. An abstract state is something that can have nested views (children) but cannot be a page by itself. In our case the bottom tabs bar is our abstract state. It can be seen on everyview but it does not have a page of its own (this is in contrast to say the Friends page that is a list of my friends, but also has nested pages with my friend's details on it).
So when we look at the tabs.html next to the views, we can see what it's connecting to:
And that it is constant on each page.
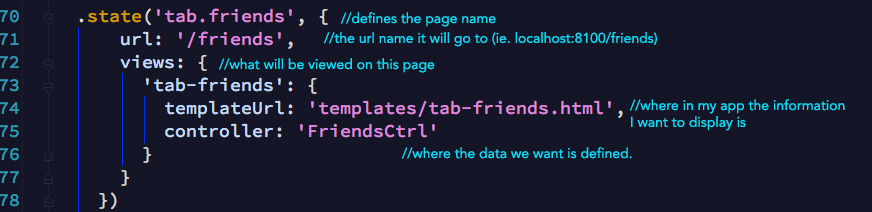
With the exception of the abstract state (tabs.html), all of our states are just like pages(or views) so when we do .state, we are defining the page:
app.js

Alright so that's a little easier to look at; so let's see what is happening. We configure the app and we pass it two arguments, the $stateProvider and the $urlRouterProvider. The urlRouterProvider is defined at the bottom and it gives a default page to load when the app starts. In this case it is telling out app to load the /tab-dash page which is our Dashboard.
*Note: The since we want our tab footer with the icons on each of our views, we need to create a tabs.html
The $stateProvider sets up the states, or the pages that our app with have.
app.js
Ionic is using an Angular UI router underneath which allows us to map urls and states to a template in a controller. What this means is that we are associating urls (ie. /friends) to templates and then using the controllers to fill in the data.
When the controller receives 'FriendsCtrl' it will do something.

controller.js
The controller.js will also have alot going on, because it controls each state that we defined in the app.js file:
controller.js

But once again, we will only be focusing on the Friends aspect of it. As we saw above the .state

We can see some of the templates on our dashboard page:

This bottom tabs bar is are tabs.html. If we take a quick look into the tabs.html:
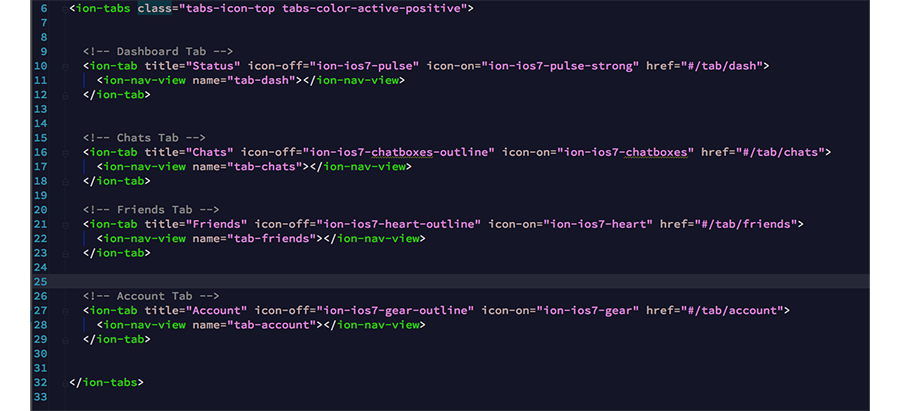
The < ion-tabs > which is a ionic directive, it createse the tab bar at the bottom of our screen, and we can see that when say the Friends Tab is touched we get directed by href to #/tab/friends.
Then if we go into Friends, we can click into individual Friends information.
Super cool right?
So let's see what is really going on here behind the scenes.
What happens when we click on the Friends icon is that we are rerouting to the 'Friends' page. This is done through a combination of the app.js and the controller.js files.
comments powered by Disqus