Introduction:
After completing Leo Trieu's tutorial, Hero: Learn Ruby on Rails and Full stack by cloning Code4Startup - version PRO, I wanted to make my website live. Initially I tried to deploy using Heroku, as Leo had taught me in the Newbie Version. However, Heroku forces you to use PostgreSQL as the app’s database and some of the gems in the Pro version conflicted with this. Instead of changing all the gems to Postgres, I decided to deploy using DigitalOcean, which allowed me to continue using SQLite as my database.
I found it tricky to deploy my application on DigitalOcean, so I thought I should create a tutorial that would help others get their sites up and running easily. DigitalOcean, a virtual private server, has a 1-Click Droplet Set up for Ruby on Rails. This type of setup uses Unicorn and Nginx as the server for your project. You do not need to have a deep understanding of either Unicorn or Nginx to follow this tutorial. Hopefully I can show you where and how you need to alter your files to make this a simple and fast setup.
This tutorial will show you how to deploy your Ruby Application live using DigitalOcean in 8 steps:
- Setting up a droplet on DigitalOcean
- Finding your Bearings with Terminal
- Installing your own App
- Pointing Unicorn to your App
- Reading Errors in Development Mode
- Pointing Nginx to your App
- Fixing the Permissions
- Switching back to Production Mode
1. Setting up a droplet on DigitalOcean:
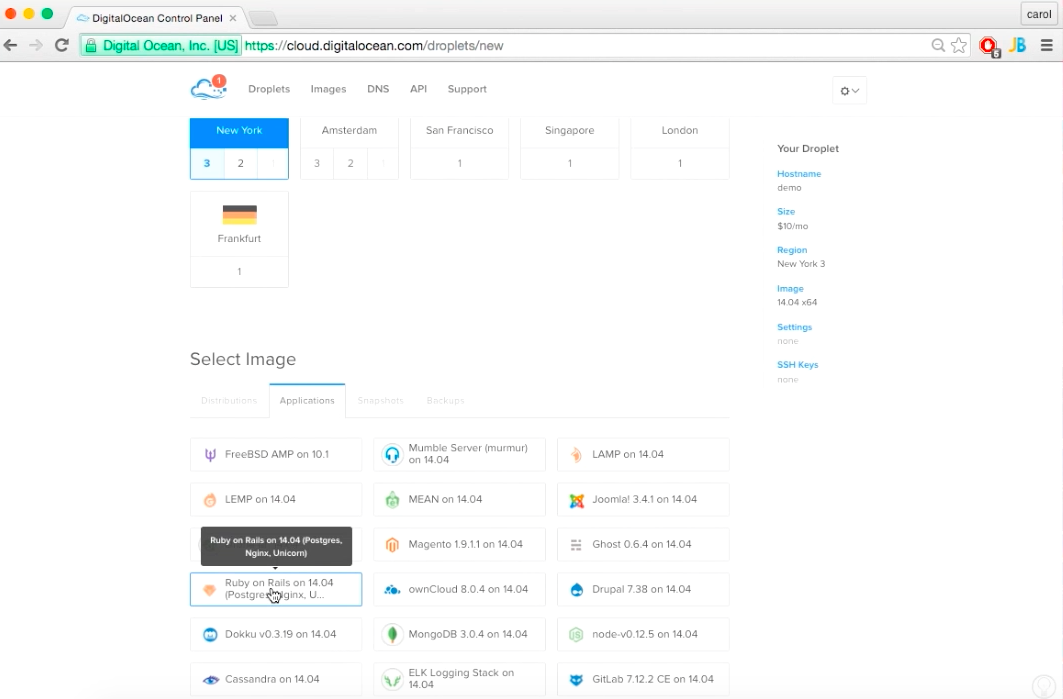
First, log into DigitalOcean and create a droplet (a cloud server) by clicking on the “Create a Droplet” button; give it a name, and scroll down to the Select Image section. Click on the Applications Tab and choose “Ruby on Rails”. This will set up the Rails Application using Unicorn and Nginx. Then confirm that you want to create the droplet.
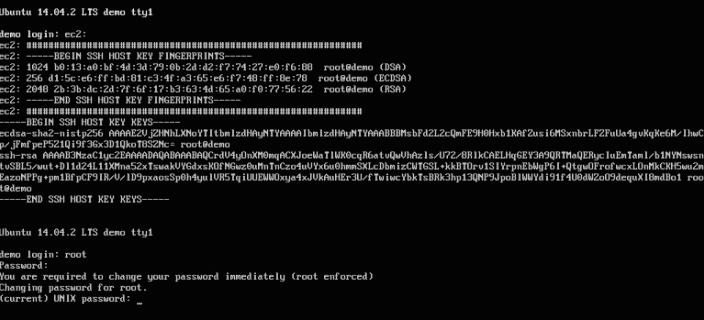
Once you have set up the droplet, you will get an email with the IP address, username, and password. Then you can go into the DigitalOcean console and initialize your droplet.

You will have to login with your username and password that was emailed to you and change your password.
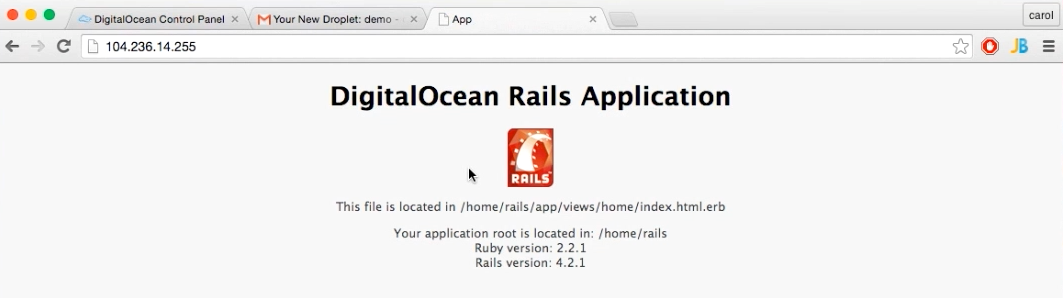
After you have signed into your application on the console, you can go to the IP Address and you will see the default Rails App:
2. Finding your bearings with Terminal:
Ok so now that you have initialized your server, you can ssh into your droplet from your terminal. You can also continue to code in the DigitalOcean console, but I think it is bulky and slow and find it much easier to code from the terminal. If you need to set up your ssh key with DigitalOcean please check out this tutorial How to set up SSH keys.
So in your terminal you can connect by:
ssh root@your_ip_address
When you first sign into your app, you are in the root folder, but as we can see on the default Rails App, the file is located in: /home/rails/app/views/home/index.html. So lets first get out of the root folder, and see where the app folder is held:
cd /home/rails
ls

Now that you know where the code that is affecting your app lives, you can pull down your own project. I used Github to save my code, which also makes it very simple to get the code into my application. In the current directory, home/rails, you will create a mirror project to the default app with your own code. First you need to install git:
//root@demo:/home/rails#
apt-get install git
Then from your git project page you can copy the link to clone your application:
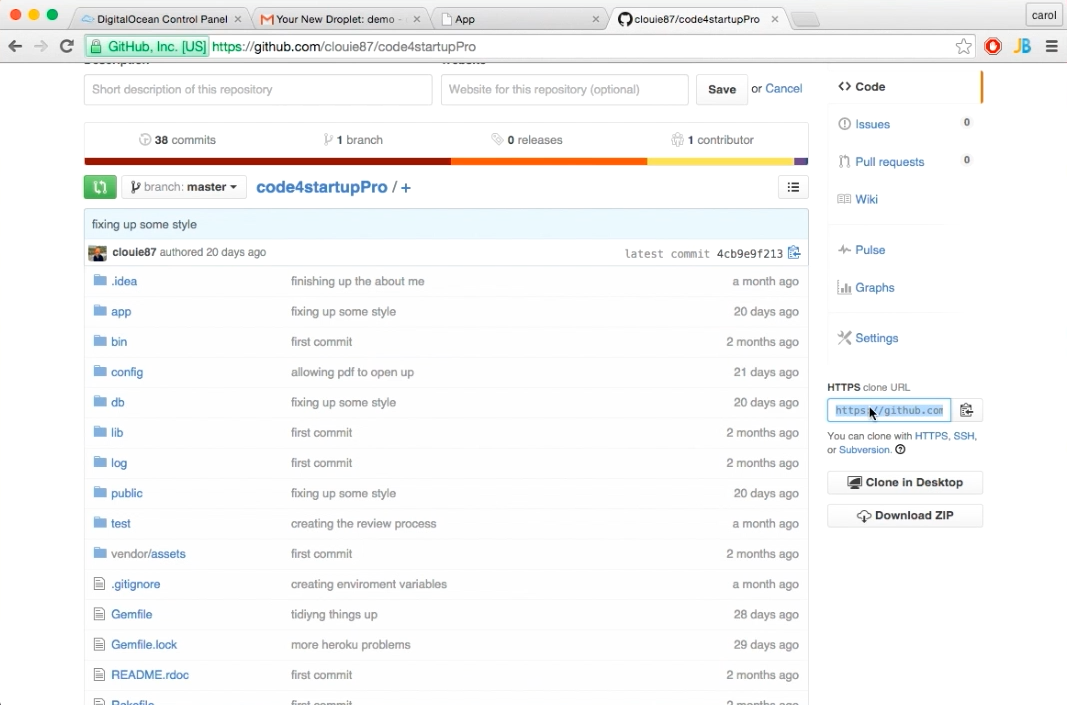
And then clone it:
//root@demo:/home/rails#
git clone [your_git_clone_link]
So my code looked like:
 So if you get the list of all the folders/files:
ls
You should see your project has been cloned:

Then you can go into your project:
cd [your_app]
Since my app is call code4startupPro, my code was: cd code4startupPro/
Once you are in your application's folder, run a bundle install to get all of your gem dependencies:
bundle install
Great! Now your app is set up! But if you refresh your browswer, nothing has changed. This is because the server (Unicorn) is still pointing to home/rails/app and you need it to point to home/rails/[your_app].
4. Pointing Unicorn to your Application:
So to have your application render instead of the default Rails App, you will need to point your server to home/rails/[your_app]. To do this you will need to change two Unicorn files. Both of these files are found in the /etc folder. To get to this folder, go back to your main folder, root@demo:/# and then into your etc folder, you can do this with this command:
cd /etc
And find the file unicorn.conf. To be able to view and edit this file you will use the command sudo nano:
sudo nano unicorn.conf
This will open up the file:

And you can see that the working directory is pointing to: "/home/rails" and you will need to change it so that it points to:"/home/rails/[your_app]". So mine looked like:

Then ctrl x to exit the file and press y to save your changes.
There is one more Unicorn file you need to change and it is in etc/default. Since you are already in the etc folder you can cd directly into default:
cd default/
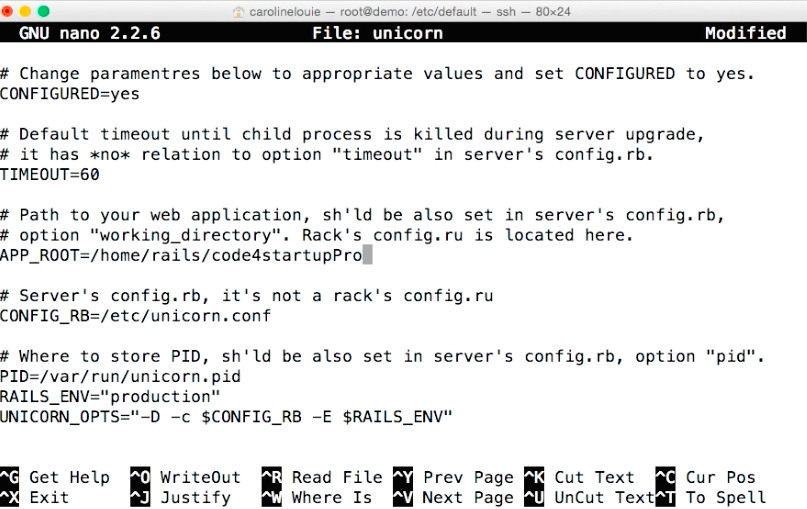
sudo nano unicorn
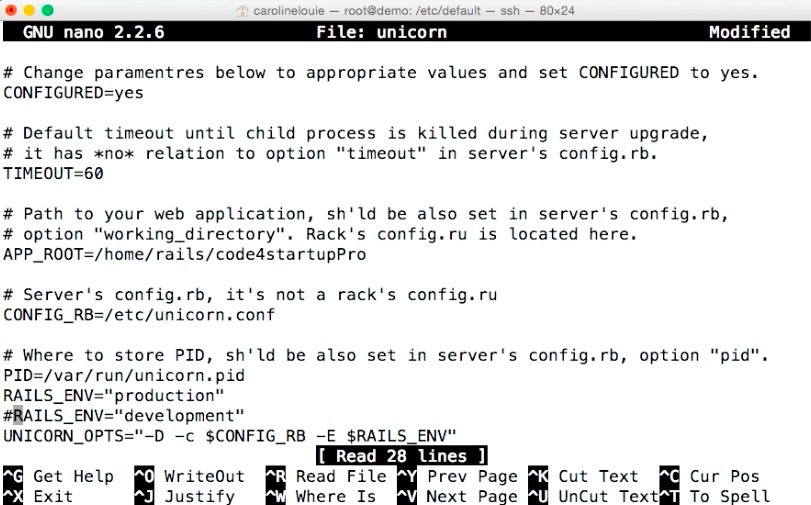
Inside the Unicorn file, you can see that the app root is set to /home/rails, you will need to update it so it is set to /home/rails/[your_app]. So for me, it looked like:
Save and exit. Since you have altered the Unicorn files, you have to restart the Unicorn server to make sure all those changes get made:
service unicorn restart
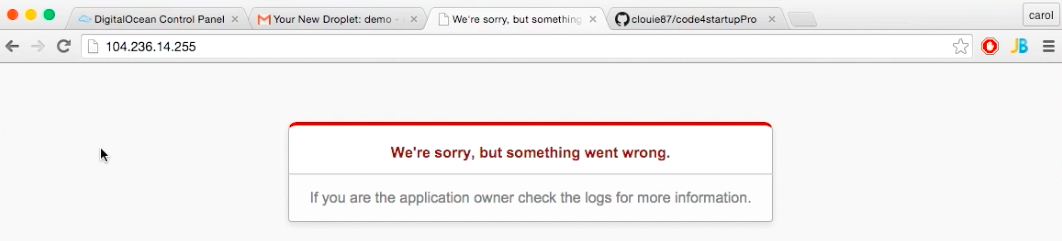
Now if you go back to your browser and refresh, you will get this error:
5. Reading Errors in Development Mode:
This is really important to know. When you set up your application you can run it on production or development mode. Production mode is what you want your users to see, so if there is an error, it just lets them know something is wrong, it doesn’t give the details of what is wrong. This protects your website and code from hackers, but it also makes it hard to fix errors if you have any. Luckily it is easy to switch between the two modes. By default, Unicorn sets up your application in production mode, but to find out what the actual source of our problem is, let’s switch your mode from production to development. To do this you have to edit the same unicorn file where you changed the APP ROOT. Get back into that file to view and edit:
sudo nano unicorn
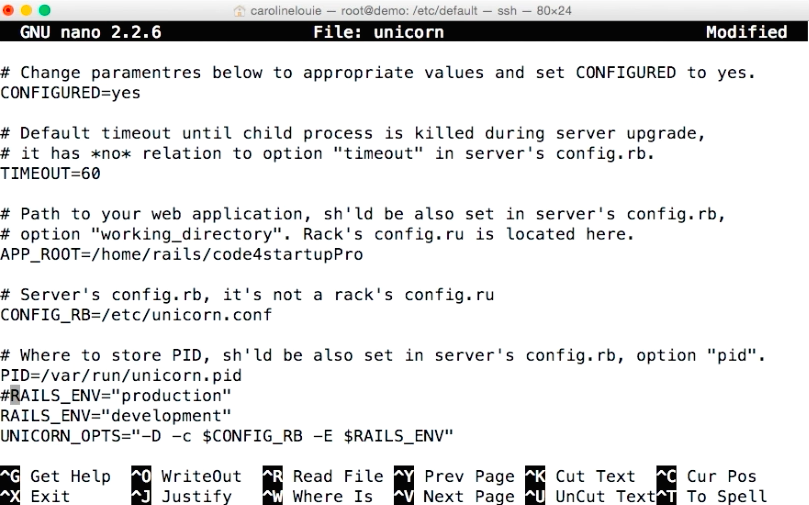
Then find the spot where the application declares that the environment is in production mode. Hash that out, and add in development mode:
#RAILS_ENV="production"
RAILS_ENV="development"
Now if you refresh the browser, you can see what the error is:
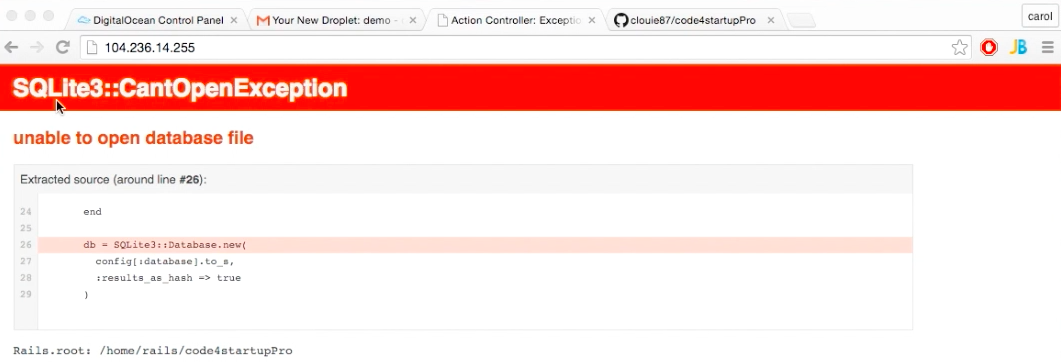
This means that there is a problem with your SQLDatabase. And that is because I haven’t setup the database yet. To setup the database you need to go back into your application:
cd /home/rails/[your_app]
And run:
RAILS_ENV=development rake db:migrate
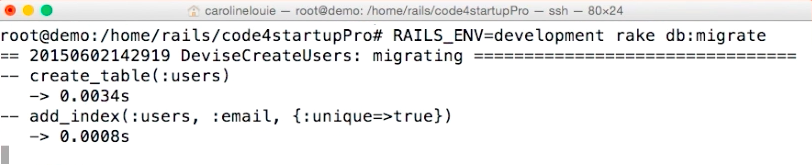
You are currently in development mode so I ran it in development mode, but since you will switch back to production mode at the end, you can setup the database in production mode now as well:
RAILS_ENV=production rake db:migrate
Great now if you refresh the browser you get this new error:

This error means that there is a problem with the permissions in your tmp folder. Now if you go back to your application:
cd /home/rails/[you_app]
You can see that there is no tmp folder to give permissions to yet. To create this tmp folder you must point Nginx to your assets folder in your application.
6. Pointing Nginx to your Application:
There is only one file you need to change for Nginx and that is in:
cd /etc/nginx/site-available
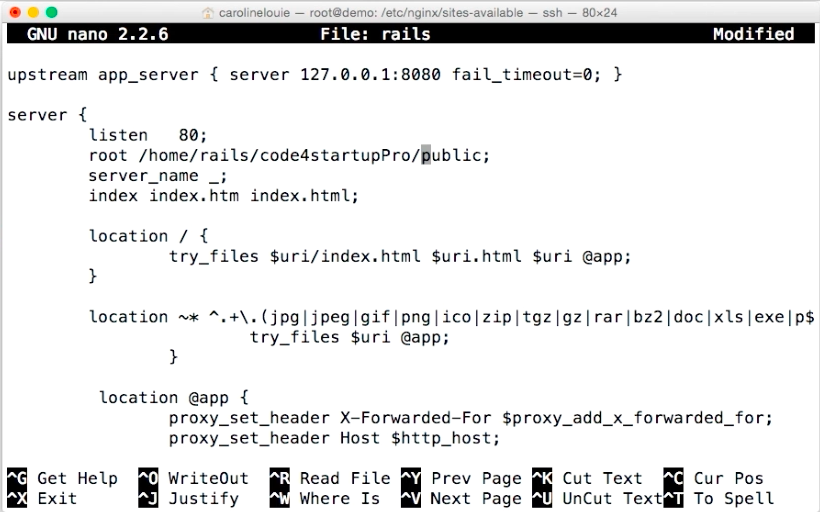
sudo nano rails
Where it declares the root, you want to point it into the public folder of your app. So
root /home/rails/[your_app]/public
Save and exit. Then you can go back into your application:
cd /home/rails/[your_app]
For me this was: cd /home/rails/code4startupPro
Now you need to move your assets into the folder that Nginx is pointing to (public). You can do this with this command:
rake assets:precompile
Now if you go into your public folder and check the folders in it:
cd public
ls
You should see the assets folder has been added into your public folder, and that a tmp file has been created in your application:

Great! Since you have updated the Nginx files you should restart the Nginx server:
service nginx restart
7. Fixing Permissions:
So now that you have moved all of your assets over to where Nginx points to, you have created the tmp folder. This means you can give this tmp folder the proper permissions and solve your Error.
Originally I found this StackOverflow solution that solved this error by:
chmod -R -777 [your_app_path]/tmp
This code works fine, but I have recently found a better solution with Unix Stackexchange. The problem with the chmod command is that it opens the directory, giving read/write permissions to anyone. This is not safe. The alternative solution is to use chown, which gives permissions only to the owner (ie. only to you):
sudo chown -R [username] [directory]
For Unicorn, the username is rails and the directory you want to give permissions to is the tmp folder. So your code will be:
sudo chown -R rails tmp
Great, now you have to restart the Unicorn server:
service unicorn restart
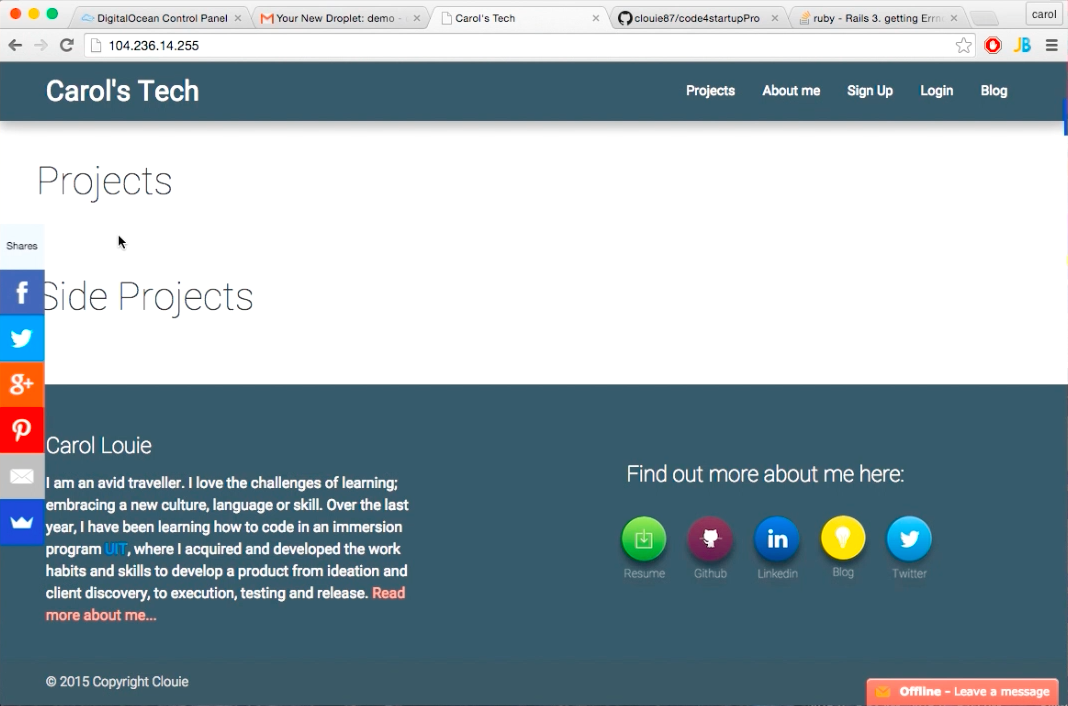
And if you refresh your browser, you should see your application up and working!
8. Switching back to Production Mode:
Alright, so now your application is up and running! That's awesome! The last thing you need to do is switch back to production mode. As I explained earlier, development mode helps us debug the application, but once everything is working it is best to put it back on production mode for safety. This is really easy to do:
cd /etc/default
sudo nano unicorn
Then you can hash out the development and unhash your production:
RAILS_ENV="production"
#RAILS_ENV="development"
Since you have changed a Unicorn file, lets quickly restart your Unicorn server:
service unicorn restart
Conclusion:
Awesome! So hopefully your application is live and everything is working perfectly! If you have any questions or feedback on how to imporve this tutorial, please feel free to leave me a comment in the discussion section.
comments powered by Disqus