
Why do I want to use Passport?
Each social network (Twitter, Facebook, Instagram etc.) sends data differently from their server and the user information is encoded differently on each network. Passport normalizes this data so it is conformed to one standard. The standardized information becomes the profile object. Since the profile objects now have the same types of data, we can save them into our database.
I used a great tutorial to learn about setting up Passport as a way to authenticate users. This tutorial set it up through mongodb. I strongly recommend the Scotch.io: Easy Node Authentication Tutorial as it was very clear.
This post will more or less follow the Scotch.io tutorial to set up my database and my next post will look at connecting passport to postgres.
Structuring our Application:
Before we begin with installing and using passport lets set up our application. In order to keep everything organized, we will break our work into a number of files. Here's and overview of what the structure of our application will look like:
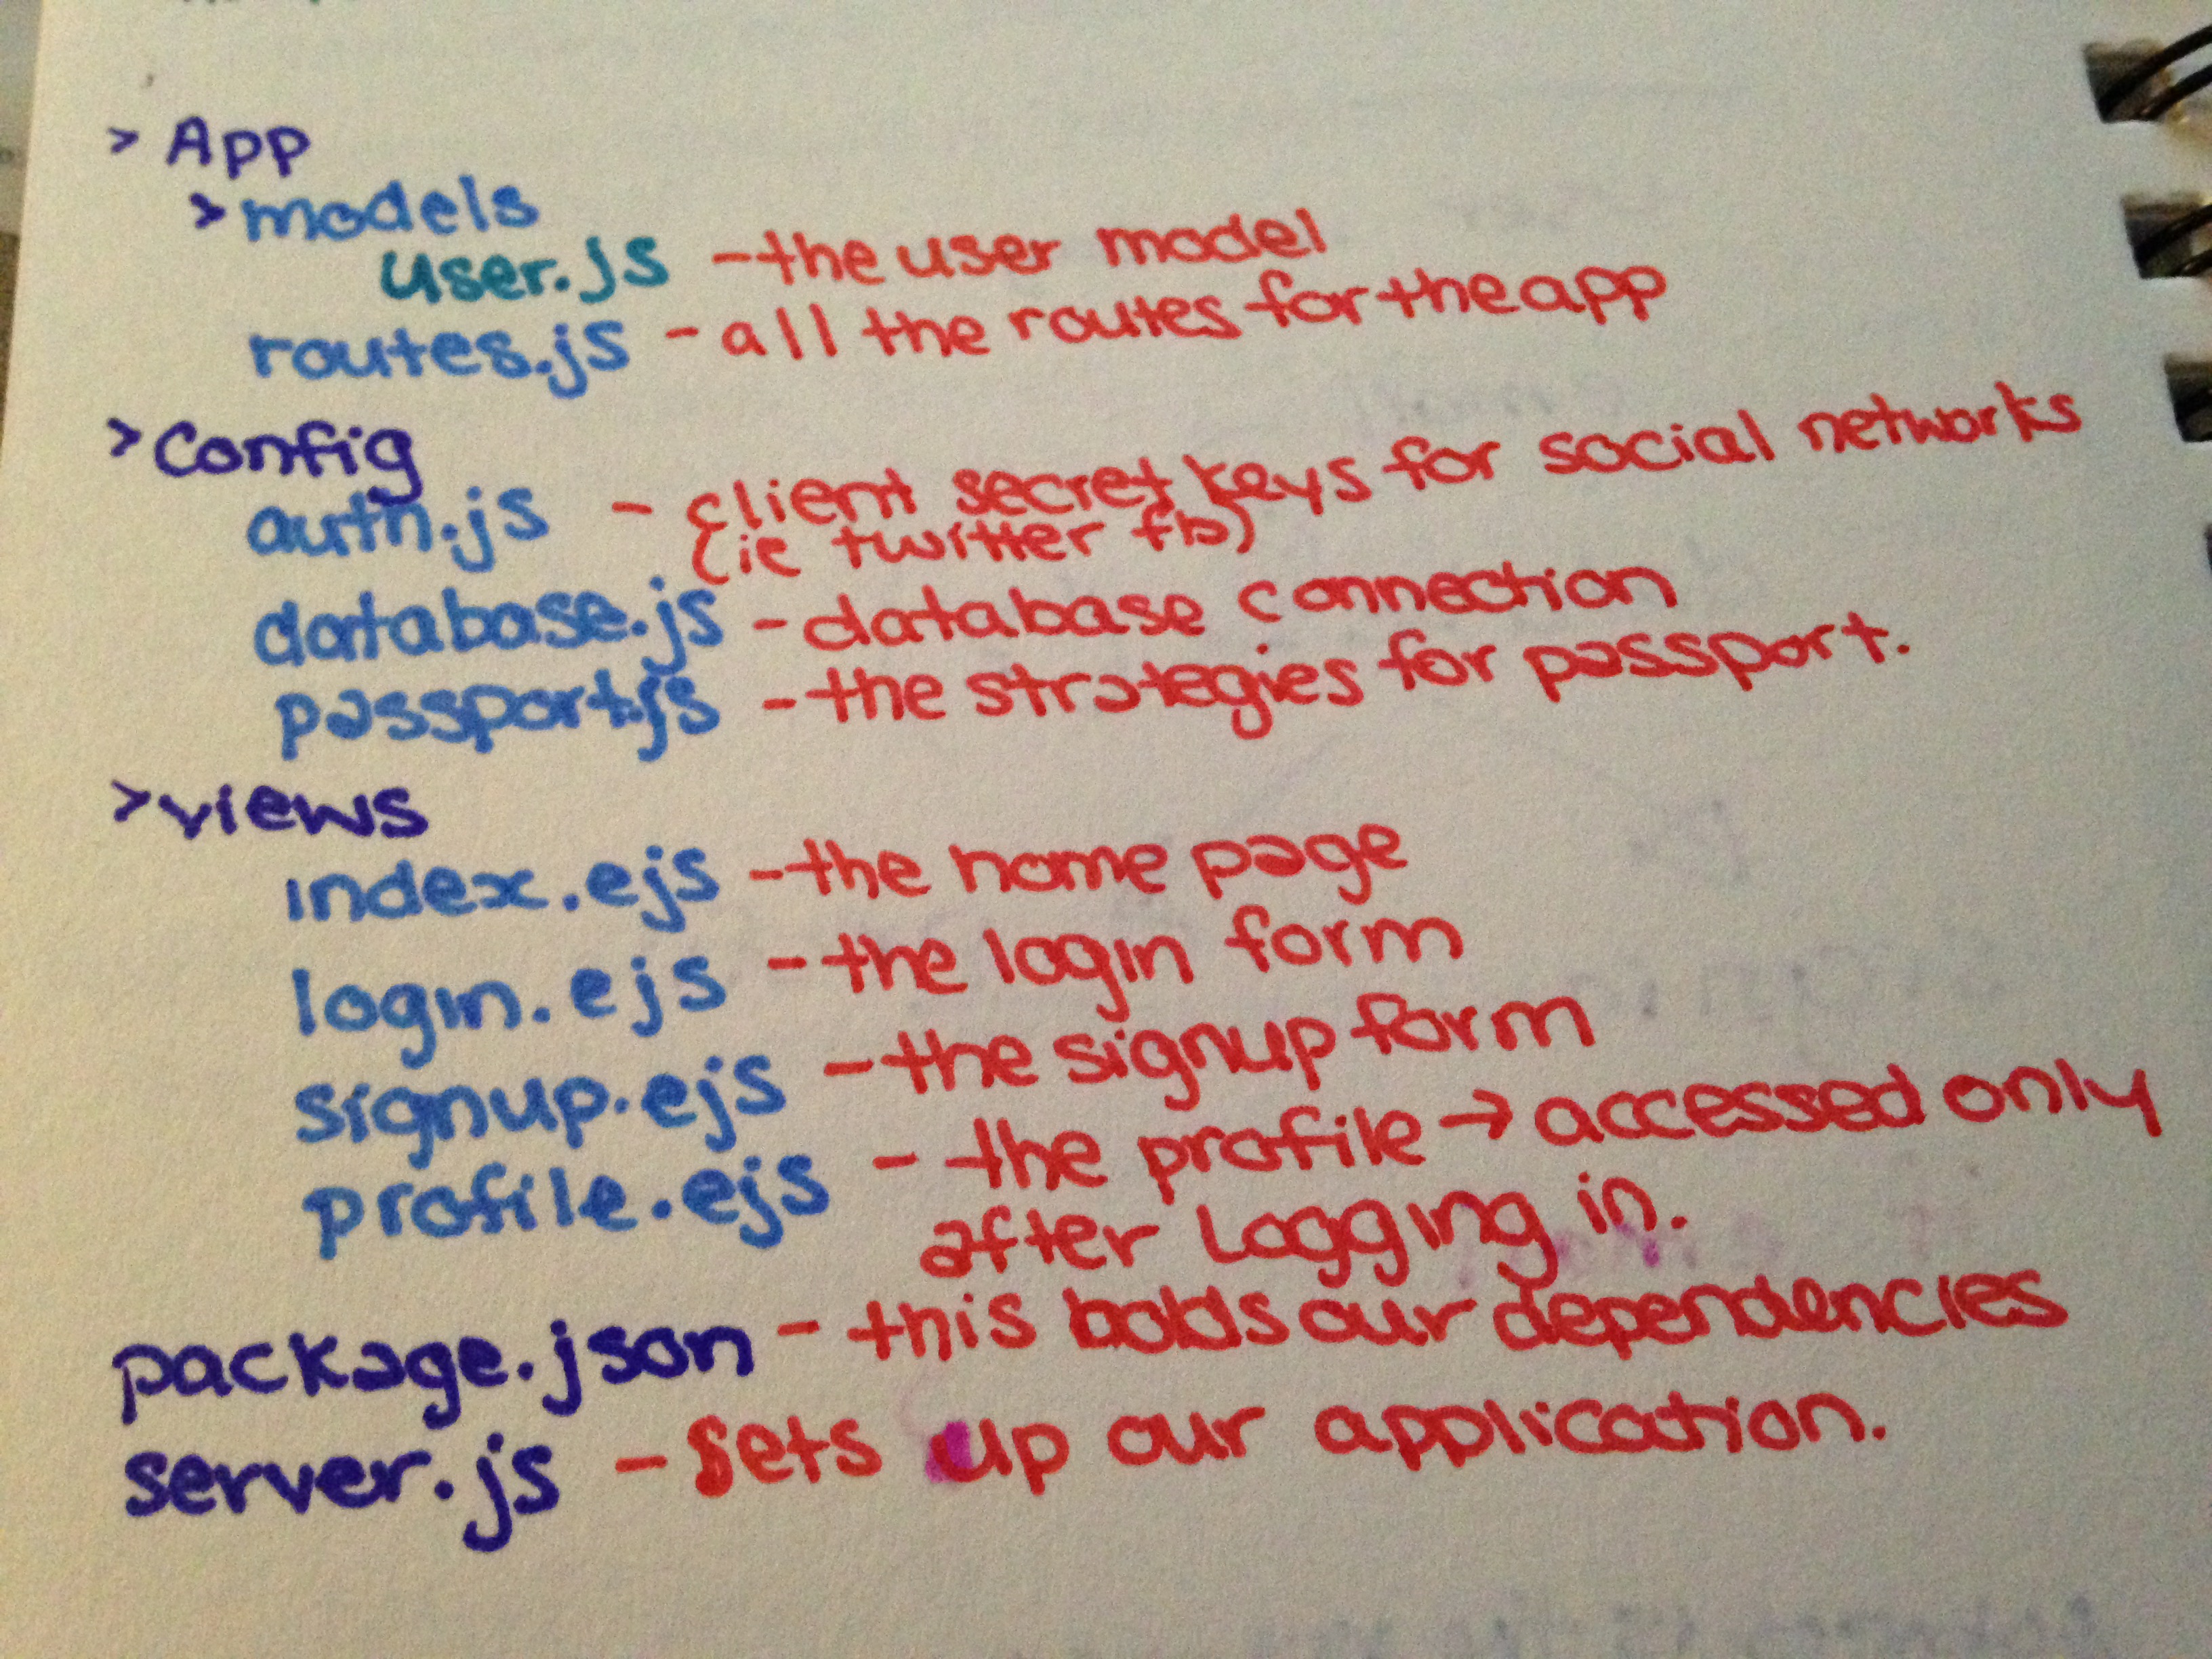
So we have 2 files:
- 1. The package.json states all the dependences that we need.
2. The server.js sets up our application. It makes our dependencies that we declare in the package.json work together. It is important to remember that this is the glue of our application so it is best if we can set it up correctly at the beginning and make very little changes to it throughout our build!
And 3 folders:
- 1. The App folder contains the routes.js which tell the app where and when to change the 'view' or page. For example, if someone logs in they will go to their profile page. It also contains the models folder which holds our user.js which is the model or schema for our user.
2. The config folder holds all the configurations of the application. The auth.js will keep our client secret keys which we will have to obtain from the social networks we want to link to. The database.js connects us to the database we will be using. And the passport.js will outline the Strategies for passport.
3. The views folder holds all the views we could have, the index(our homebase), the login, the signup and our profile.
This might feel a little overwhelming right now but thats totally fine. We will go through each of these files to see what exactly they do and how they interact with one another!
Setting up the Dependencies
Our dependencies are declared in our packaged.json file. These are all of the packages that you need to download
$ npm install in order for the application to run smoothly. This is what your package.json should look like:
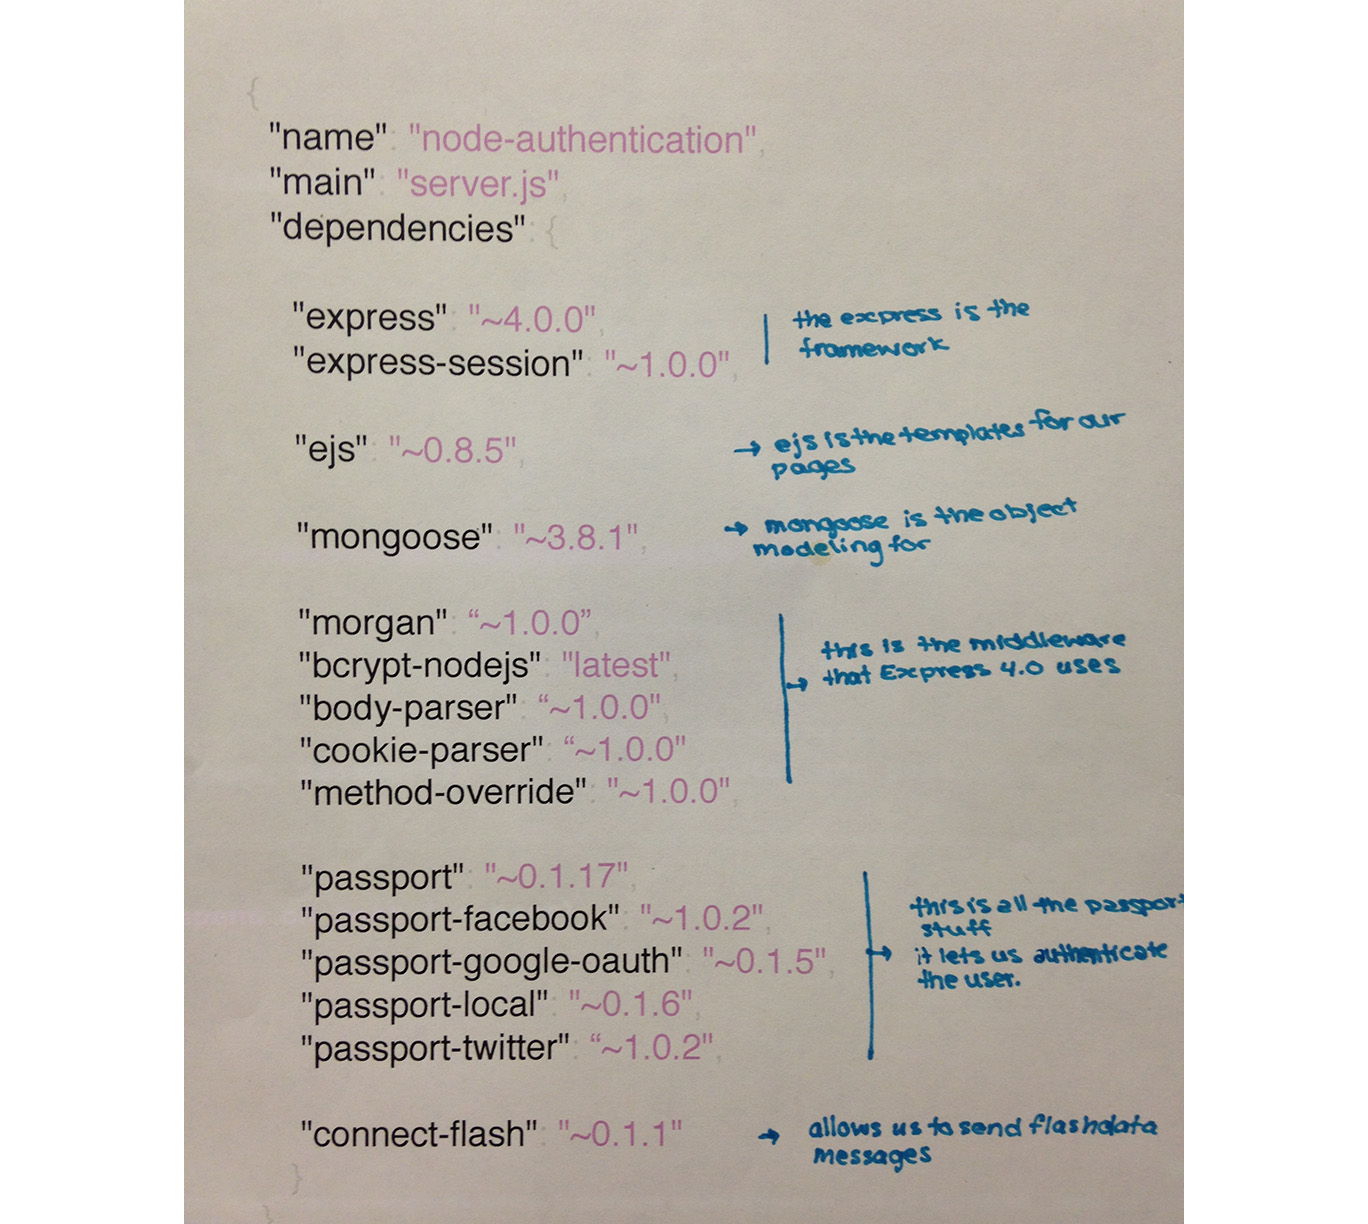
Our dependencies include:
Setting up the Application
Like I said before, the server.js file is our glue. It makes sure that the dependencies that we get from the package.json work together and do the things they should. So when we set up our application, we are really setting up our server.js file.
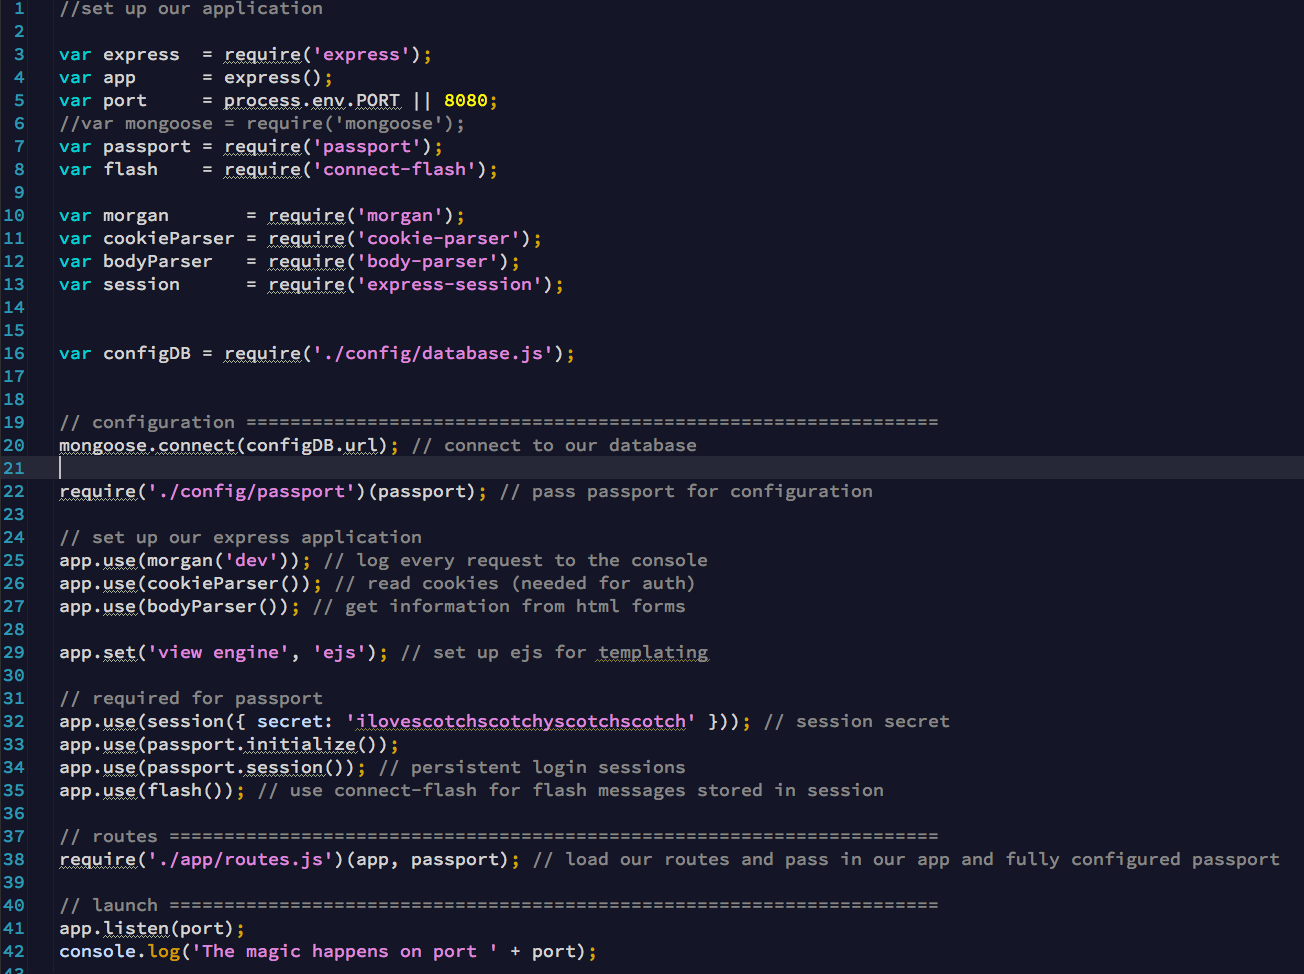
First we want to require all of our dependencies that we have in are package.json file.
Then we want to do some configuration: we connect to our database, then pass the passport object to config/passport.js.
*Note: It is important to know the path that the passport object takes so we know what is going on. We create the object in the server.js, then we pass it to config/passport.js. Here the object gets configured through stragtegies and it is then passed on to the apps/routes.js to determine the page it will be routed to. I will touch on this again so don't worry too much but do keep it in mind.
Then we set up the middleware for express and for passport. Since we are using express we need to use passport.initialize() middleware to start passport (Passport docs).
Also, we want our login sessions to be persistent, so we need to use passport.session(). *Sidenote: express.session() must be used before passport.session() to make sure that the login sessions are restored in the right order (Passport docs).
Then we load our routes and launch our application on port 8080. Our application is now set up!!
You can run the server by typing in terminal:
node server.js
And go to http://localhost:8080 your application will be up and running! But we haven't written any code for what the pages will look like yet, so right now, it will be pretty unimpressive.
Connecting the Database
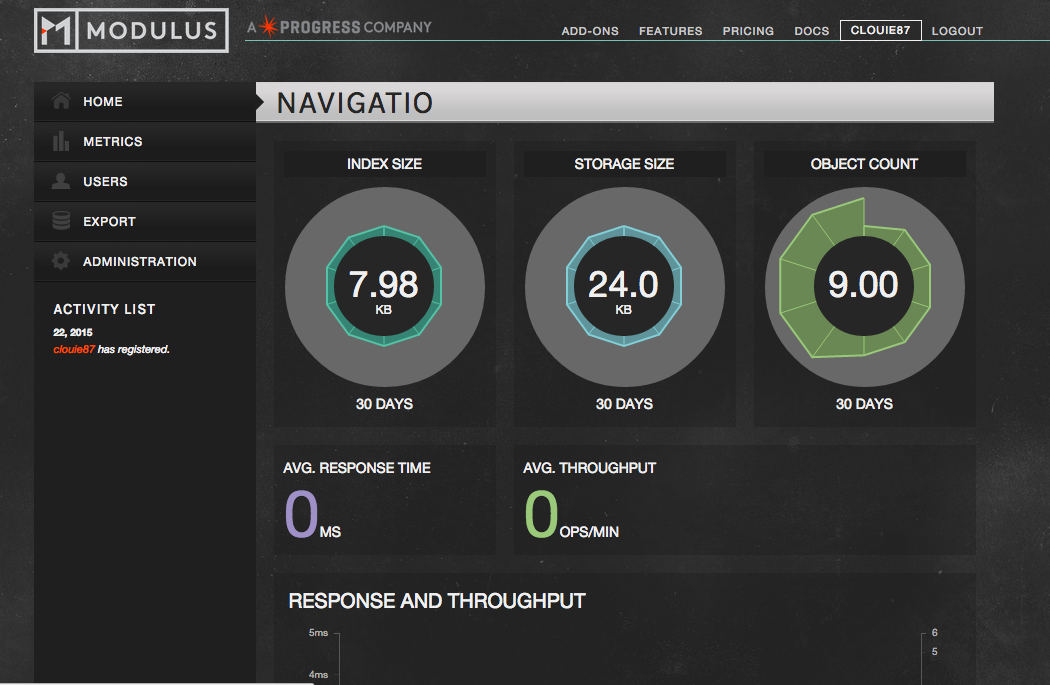
The tutorial recommended that I set up an account with Modulus.io which I did. This is a really easy way to set up mongodb without having to install it into your computer. You have to setup the application and find the connection url. When you log into modulus it will take you to a screen that looks like this:
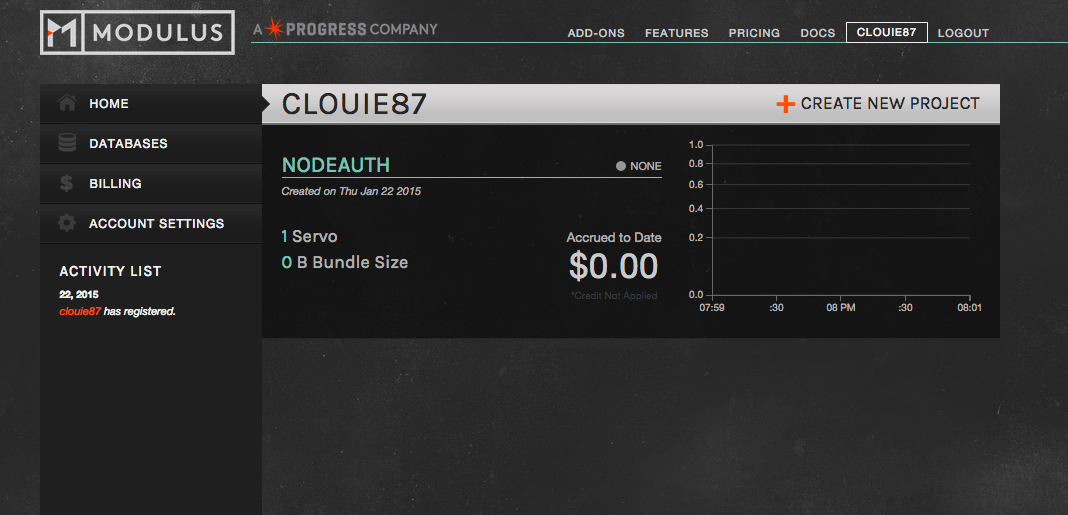
Click on the DATABASES on the left navigation bar. And click on +CREATE NEW DATABASE
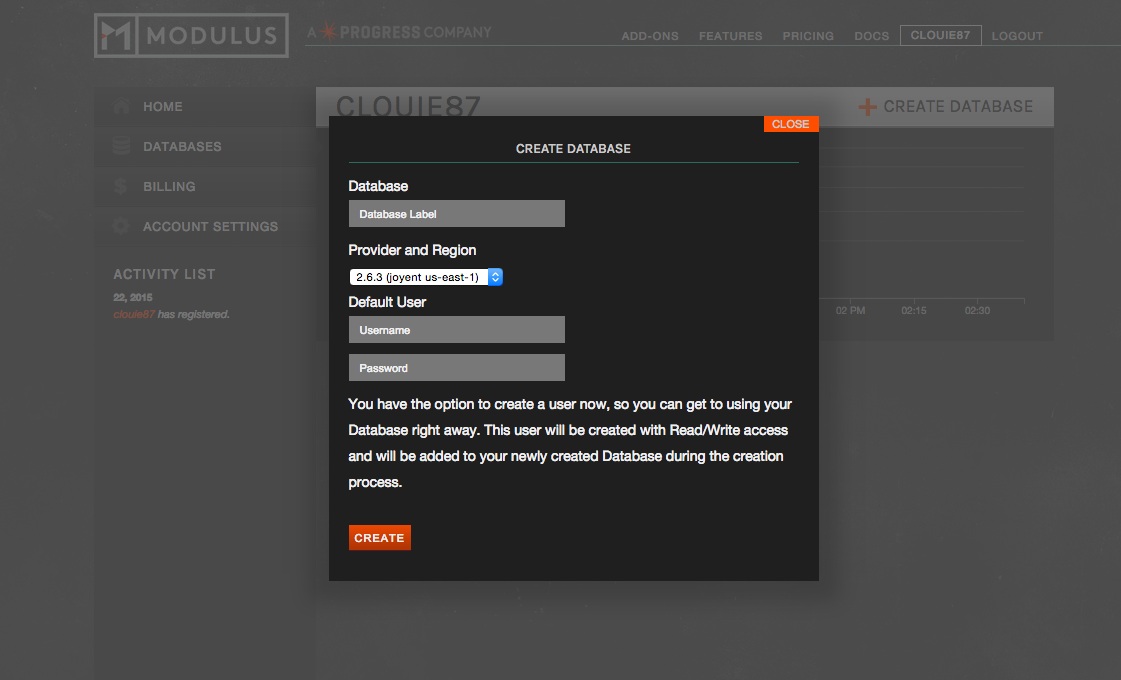
Remember the username and password you create because you will need it for your connection string! Create the database and then enter it:
If you click on ADMINISTRATION on the left navigation bar, you will find your connection strings. Copy the connection url and paste it in the config/database.js file.
 Replace the
 Ok awesome so now we have mongodb set up! And we are ready to delve into the application itself.
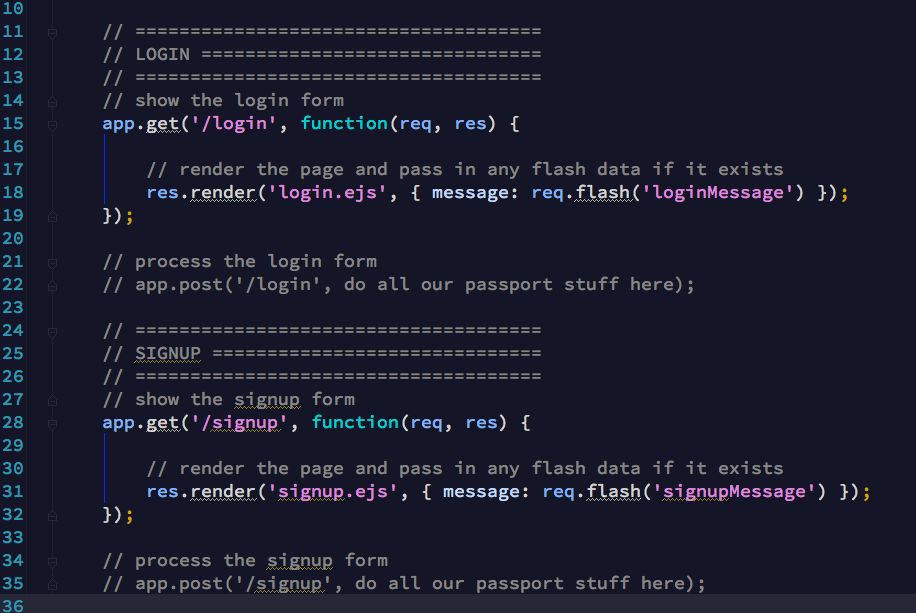
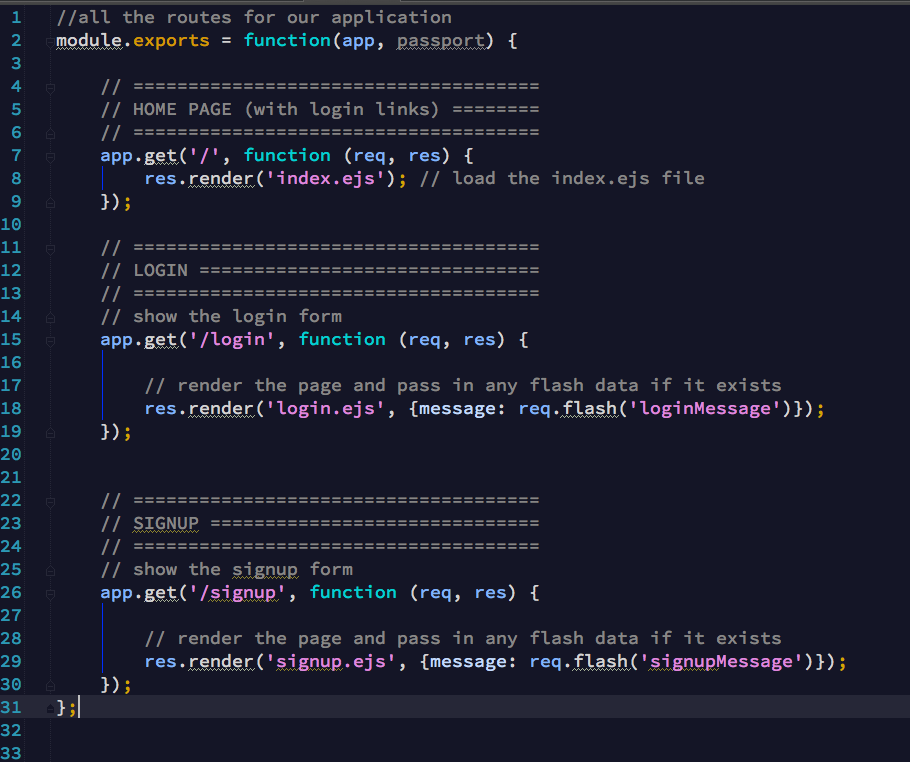
Setting up the Routes
The routes navigate the user through our different pages. For right now I will just touch on the routing but I will return routing as we add in more functions for our application.
As a quick refresher we have 4 pages (or views) which are:
To set up the routes we must think about how things will flow with our application.
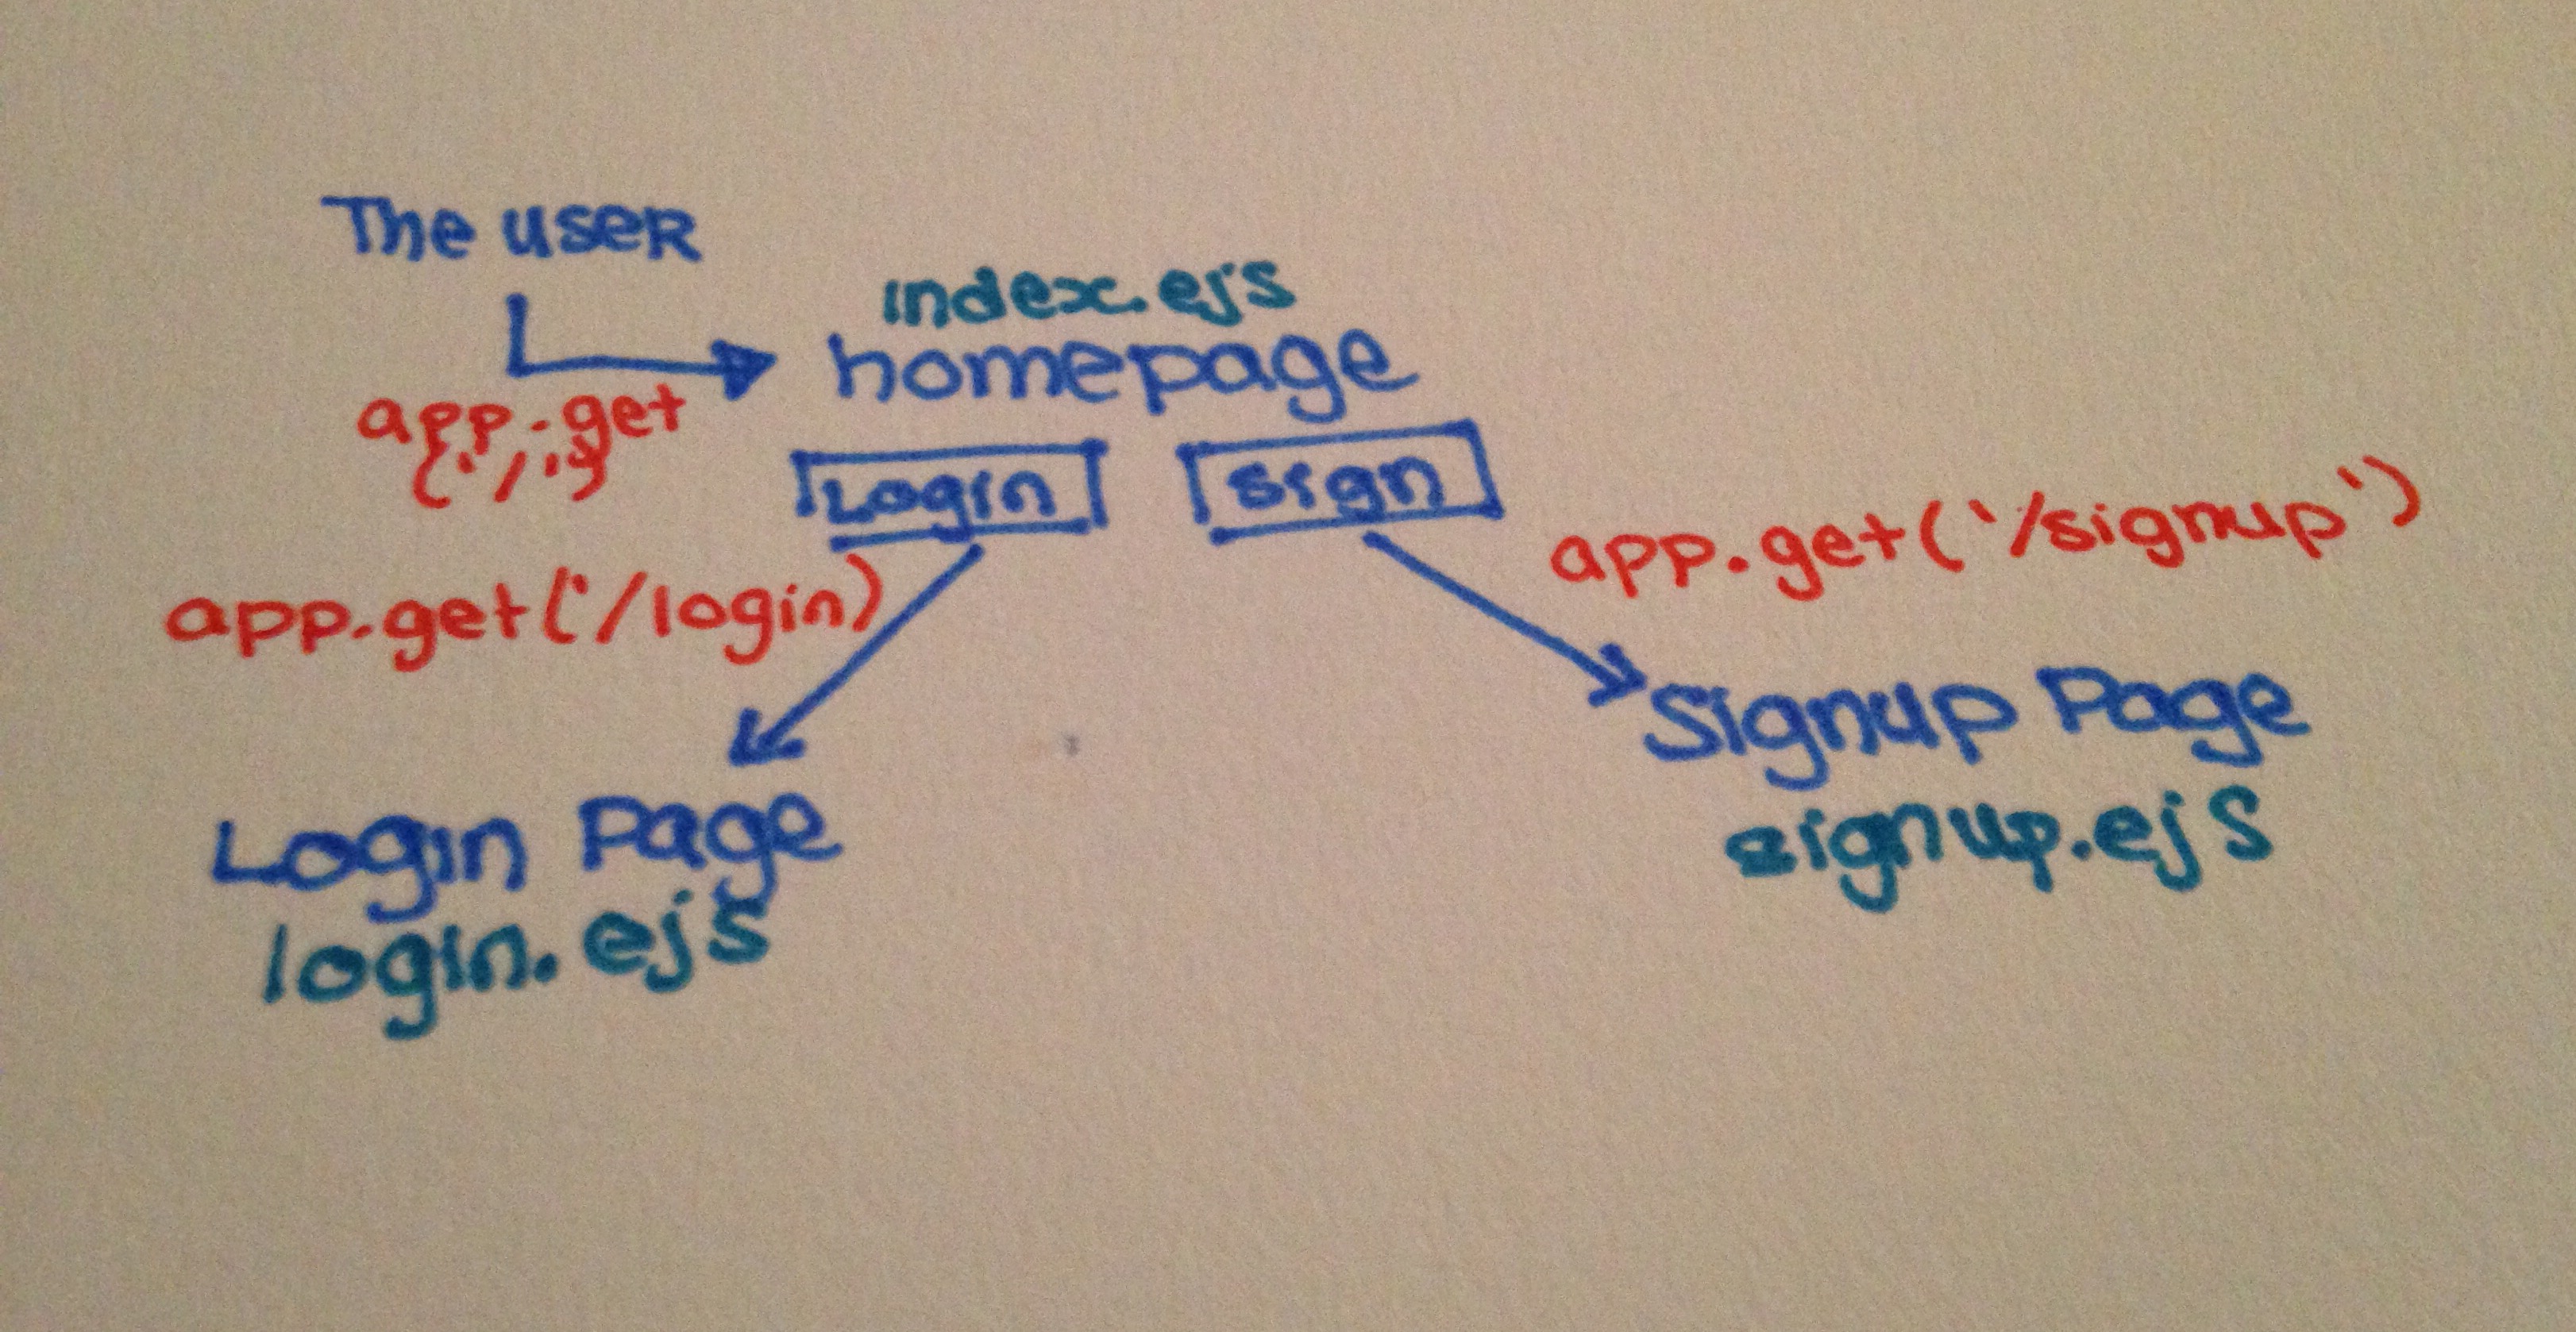 When the user enters our webpage, they will first go to our homepage (index.ejs).
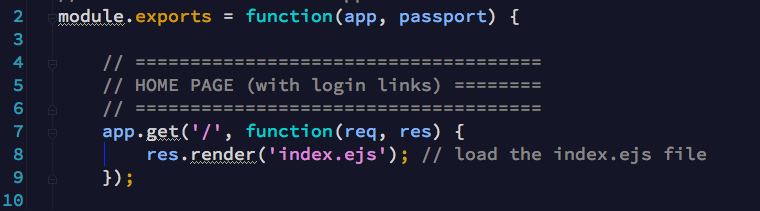
Here the application gets the information from the index.ejs file and renders it. On the homepage there will be two buttons, one for login (if the user is an existing member) and one for signup(if the user is new).
So when user clicks the login button I want to route them to the login page. Or when the user click signup I want to route them to the signup page.
Once the user puts in their credentials, we will have to authenticate it (this will be done through passport).
*Note: This will be described in greater detail when we implement passport but for now I just want to touch on the difference between app.get and app.post:
app.get tells express to listen for requests and then retrieve data on our page and displays it, while app.post sends data on the page to get handled (through a function) if the data is verified it will redirect to the profile page, and if it is unverified then it will bring us back to the login page.
So I will stop the routing here. Currently our functionality for routing will allow us to get the homepage up on loading the application. Then either get the login form or get the signup form depending on which path the user takes. We cannot access the profile page until we authenticate our user.
So for right now our routes.js file looks like this:
Setting up the Views
So let's stop thinking theroretically about our views and let's make them real!
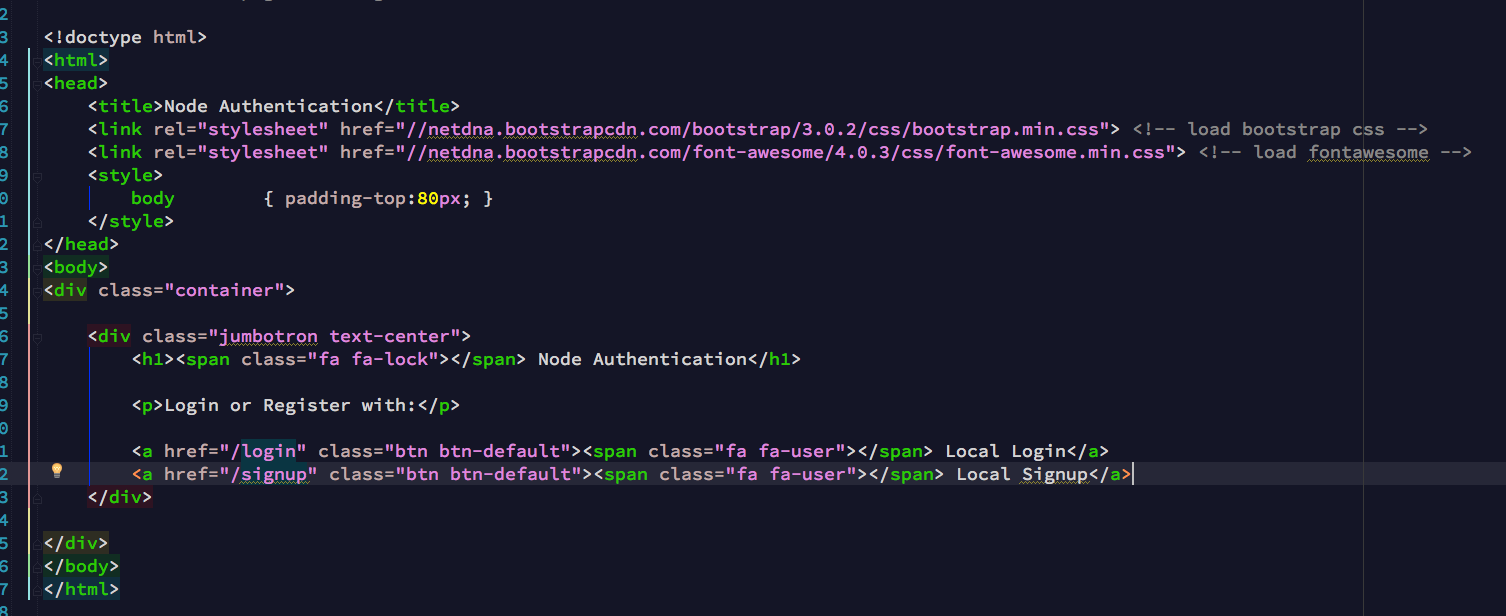
The Homepage (the index.ejs)
Our homepage will just ask the user how they would like to signin: by logging in (if they have signed up in the past) or if they are a new user by signing up. For now we will stick to these two methods of logging in, later we will add using social networks as a way of logging in. Here's the code for the homepage (once again I would like to stress that this was created by the fine individuals at scotch.io):
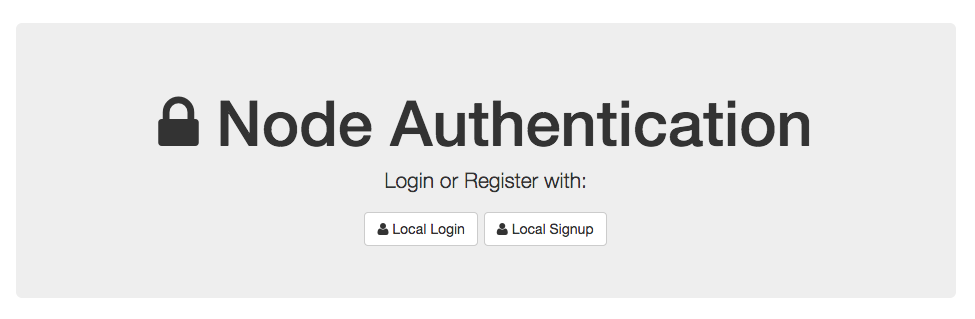
And if we run our server (node server.js command into terminal) it should look like:
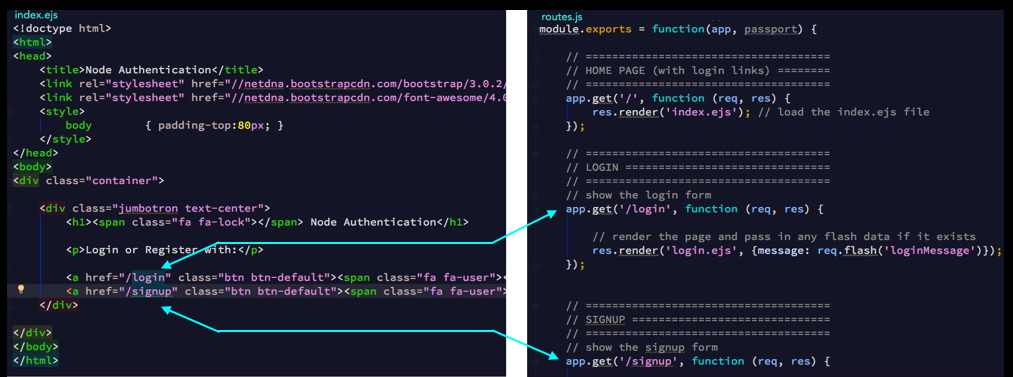
*Note: The href on the index.ejs files correspond to the app.get('/login', function()) and the app.get('signup', function()) on the router.js file. This means that when the login button is clicked, the app.get('/login', function()) runs and the login.ejs page is rendered.
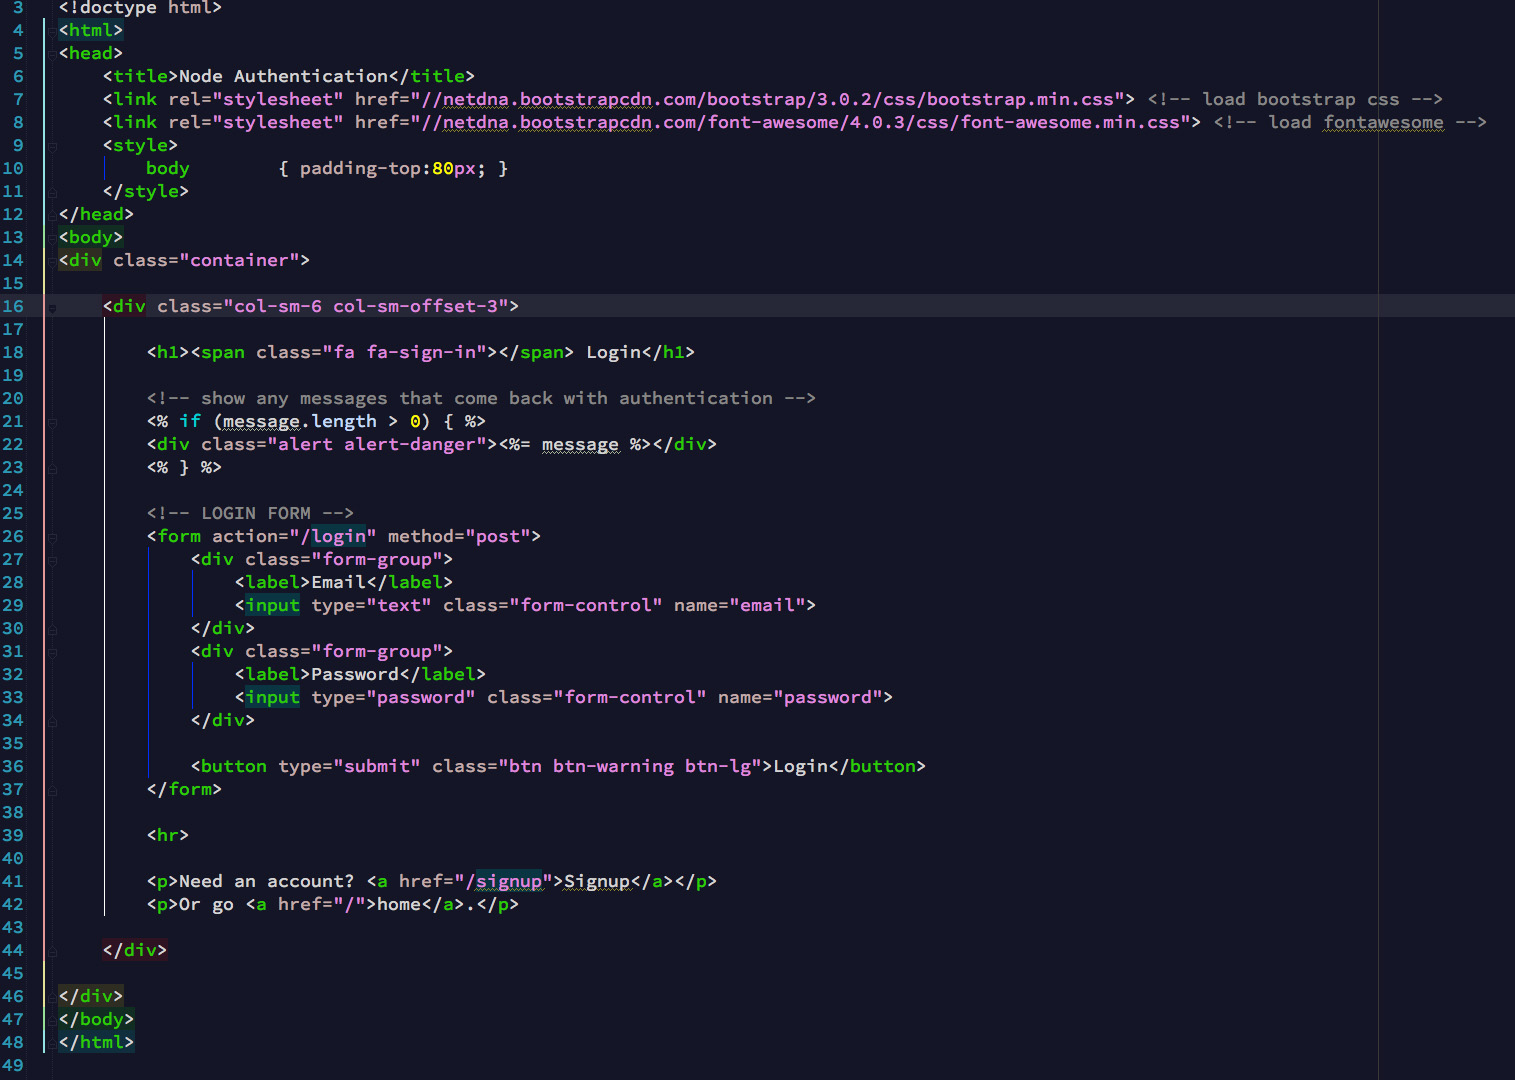
The Login Page (the login.ejs)
So now lets say the Login button is clicked, it goes to the routes.js function and reroutes us to the login.ejs page. Here we want to ask the user for their email and password to verify that they are who they say they are.
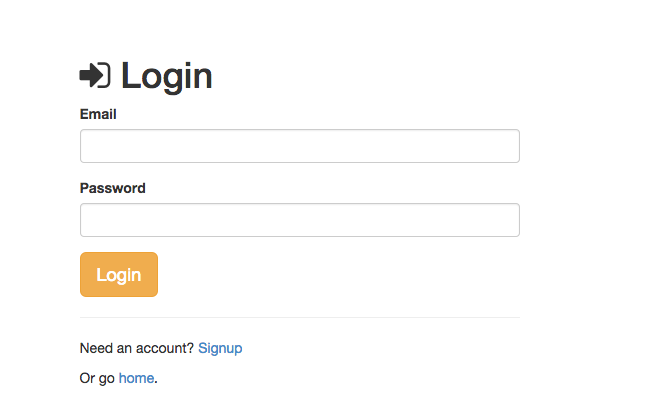
 And if we run our server (node server.js command into terminal) it should look like:
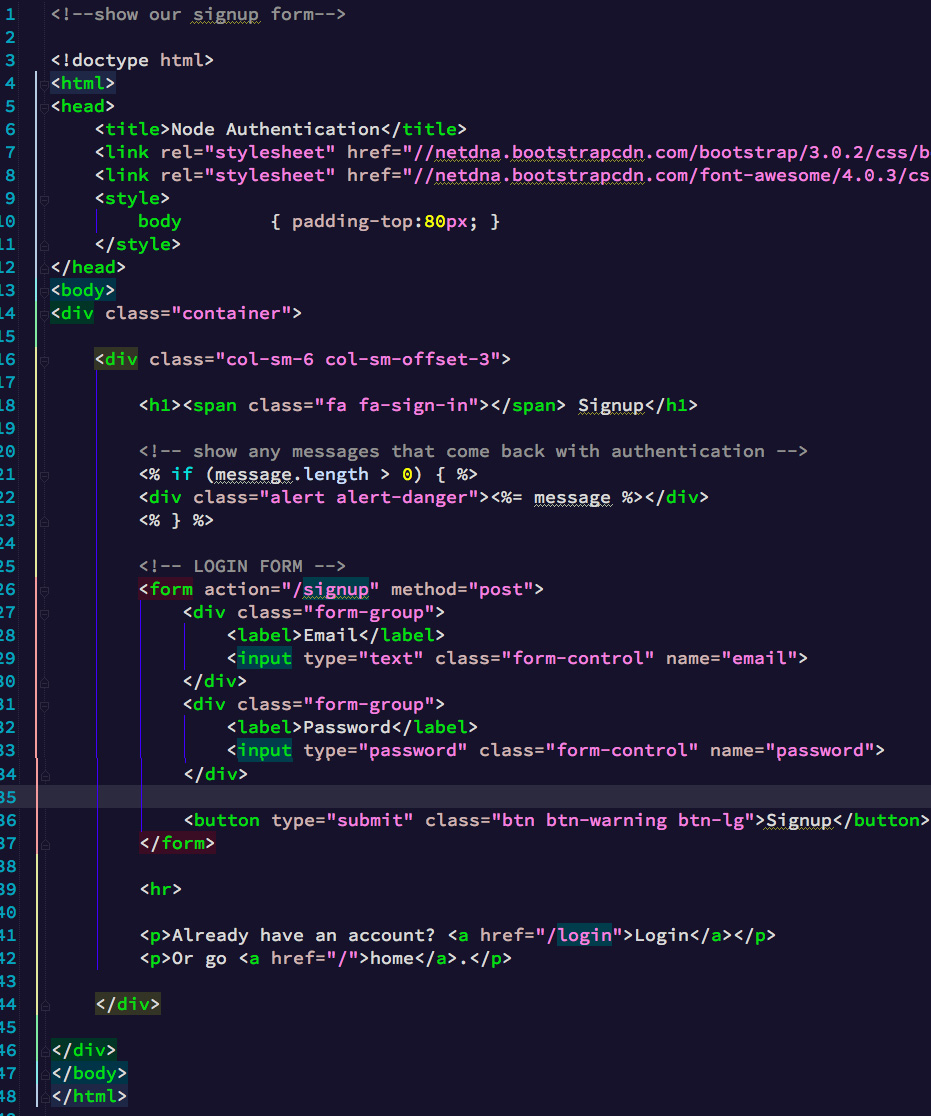
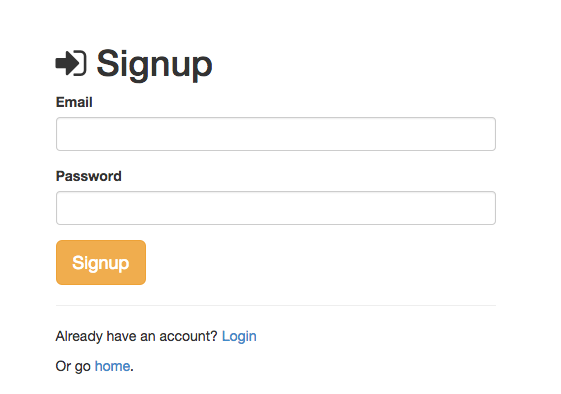
The Signup Page (the signup.ejs)
The Profile Page (the profile.ejs)
This page will only be available to individuals who have passed the authentication process!! For now we will just print out the user information so we know that everything has been logged and saved properly.
Setting up the User Model
Our user model will have multiple accounts, but for now we will focus only on the local ones. So for our local user we want to store the users email and password. For the social networks we'll keep track of the profile id and their token.
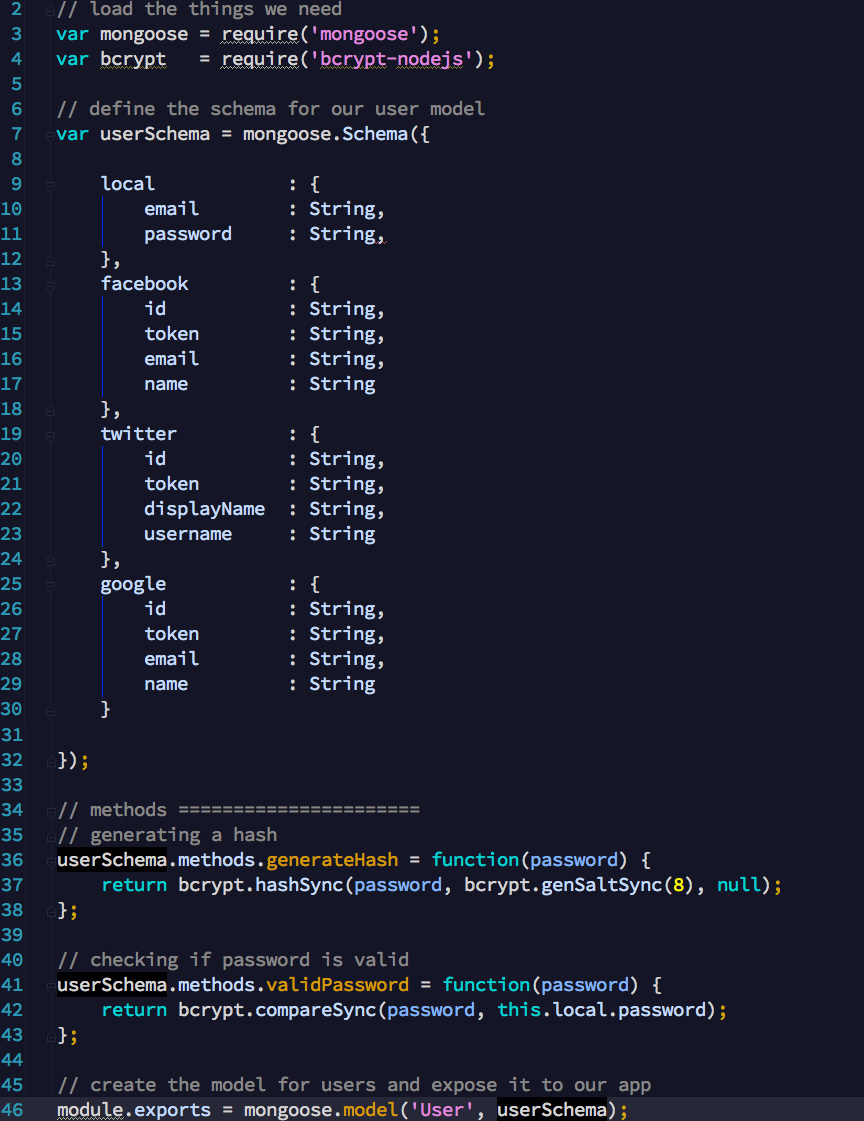
Once we've recieved the users password we will want to hash it before we save it into the database. Now everything is set up! We can start the Passport Process.
comments powered by Disqus